Electric car
Budget electric car conversion. (continuation)
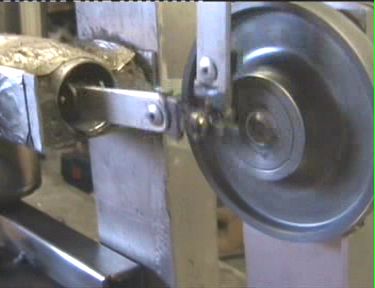
On the picture below the power plant is in the engine bay and the gearbox mountings are all bolted to the car's body the rear of the motor is supported by the jack underneath and supporting mounting is needed to be manufactured.  On pictures below you can see the motor plate has a trough like piece of metal already bolted to the plate and the place for the mount welding is prepared. 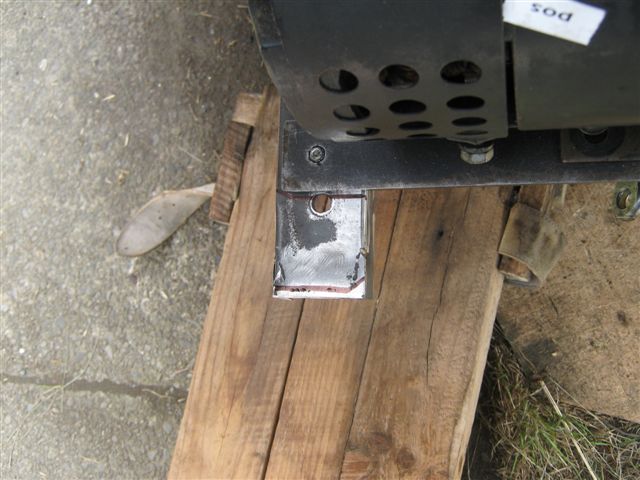 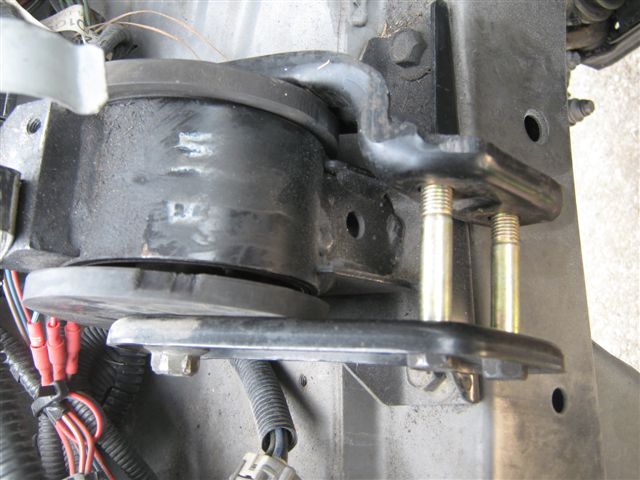 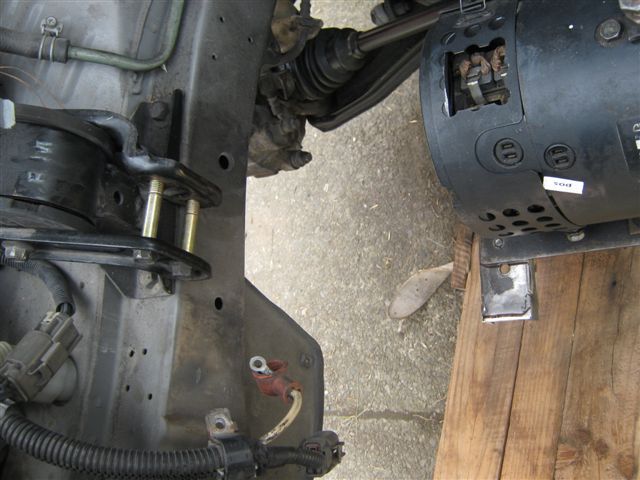 On the picture below you can see two pendants that were cut off an old car suspension, and will be used for the motor mounting. 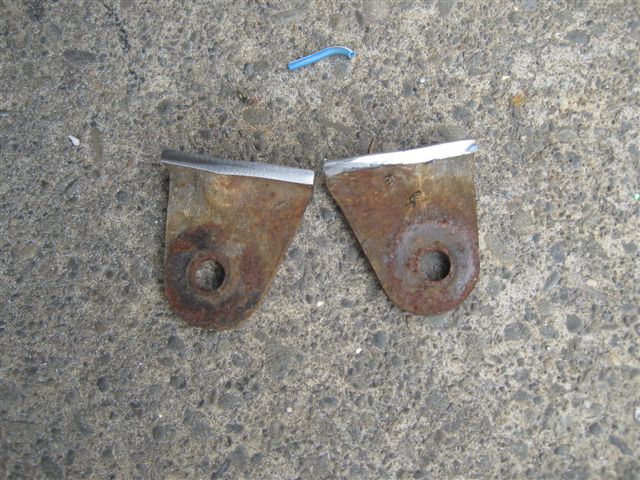 On the following pictures you can see the length of thick aluminum that will link the motor mount with the mounting attached to the car's body (see pictures above). The piece of aluminum is marked and cut to fit to the mountings. 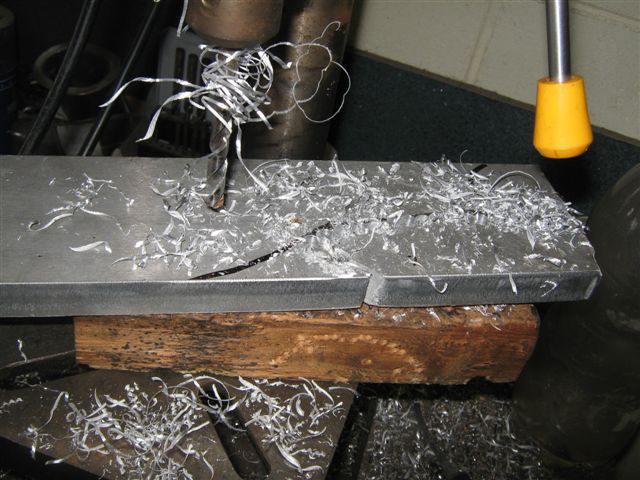 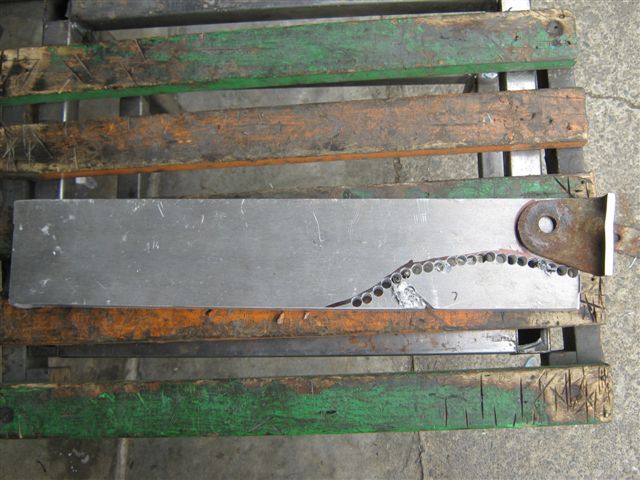 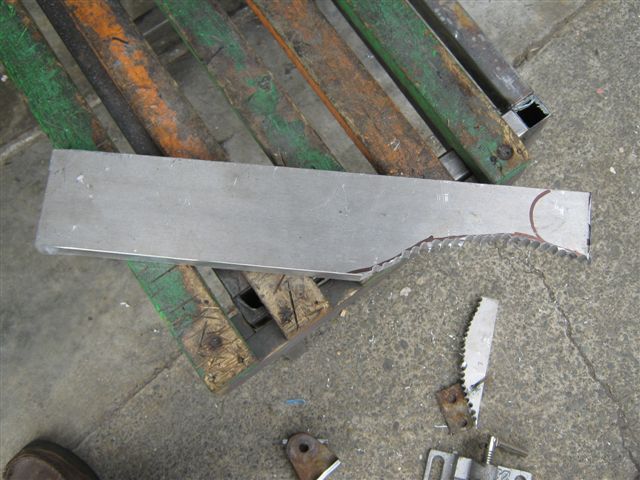  The steel pendant is placed over the aluminum link to mark the location of the hole for the bolt that will keep the link and the pendant together, the hole is drilled and bolt is selected. 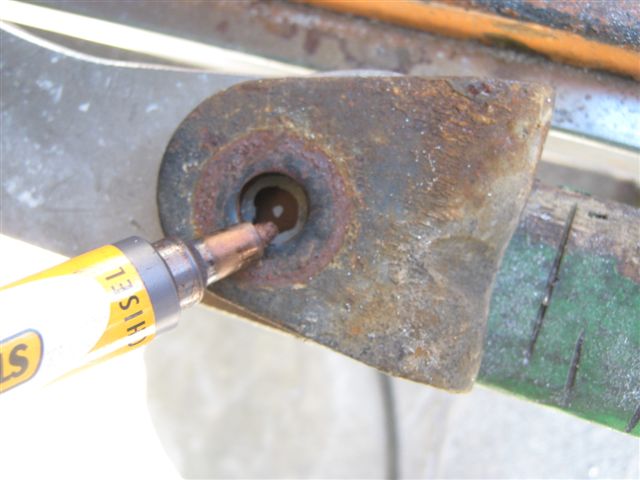   Here you can see the pendants are welded to the support trough and link is bolted to the motor plate mounting for the first time. 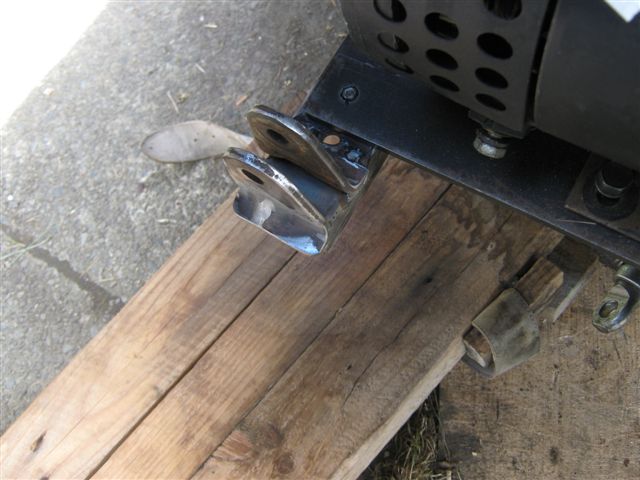 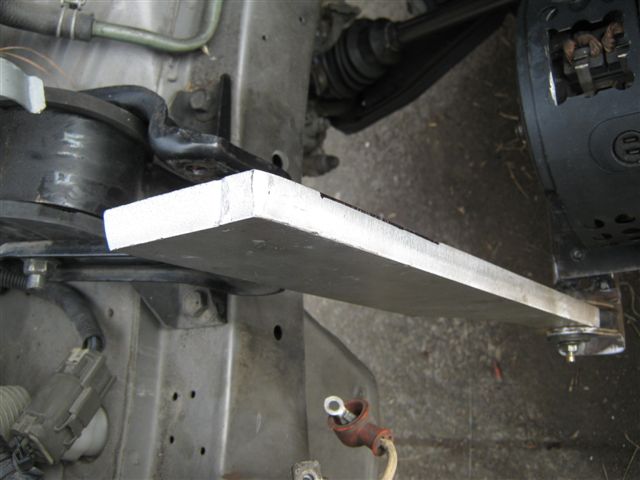 To make the aluminum link to remain in vertical position we will need to build an extra linkage between the top of the link and the mounting that attached to the car's body, thus to build this extra link we will use some aluminum off cuts that left from the motor/gearbox adaptor production. 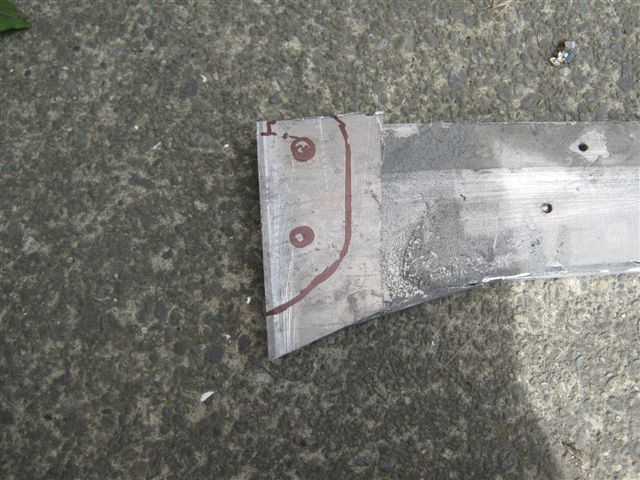 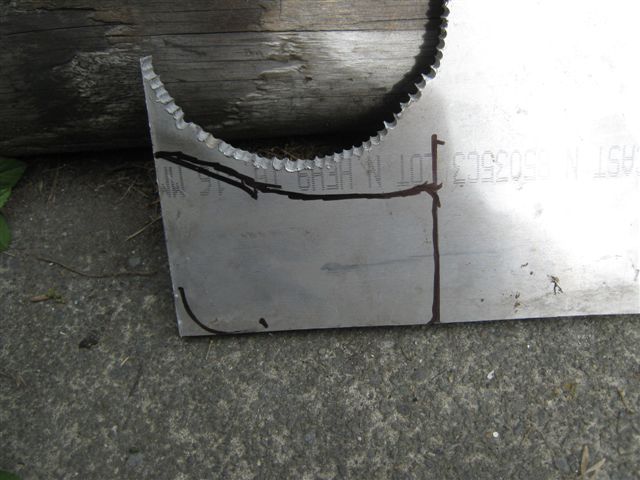 All necessary markings and measurements are done and we can start drilling, please note that I am not specific about sizes and measurements because in your particular case there could be a different car, motor and gearbox, so I am just trying to give you some idea and to prove that the electric car conversion can be done with a few tools, a few bucks in a pocket and under the blue sky by anyone. 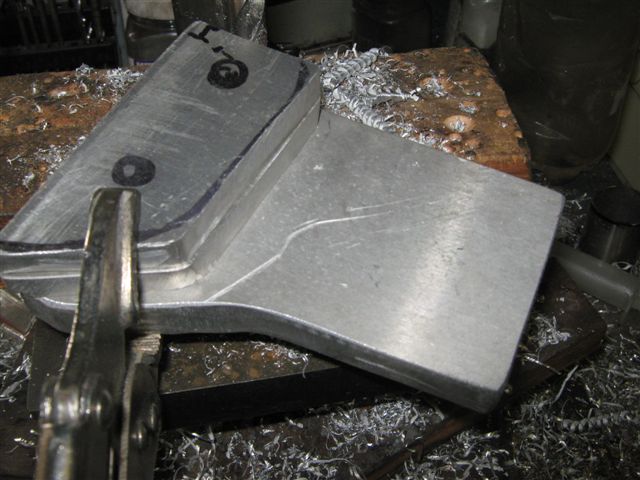  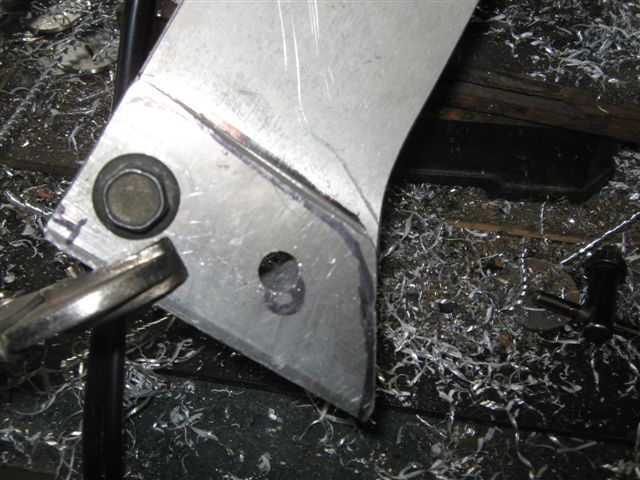 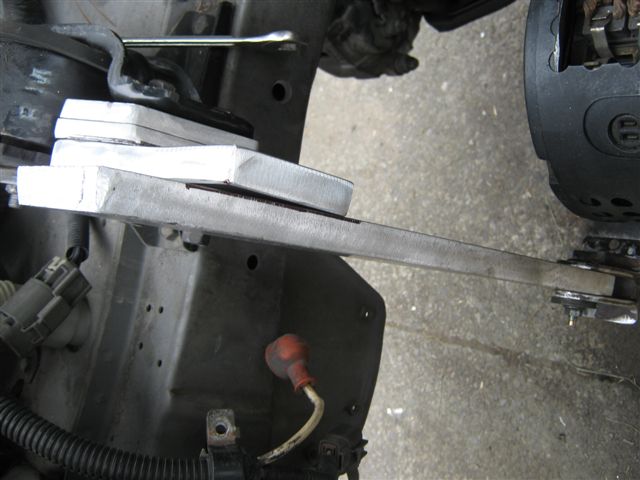 The aluminium mounting is ready to be drilled: 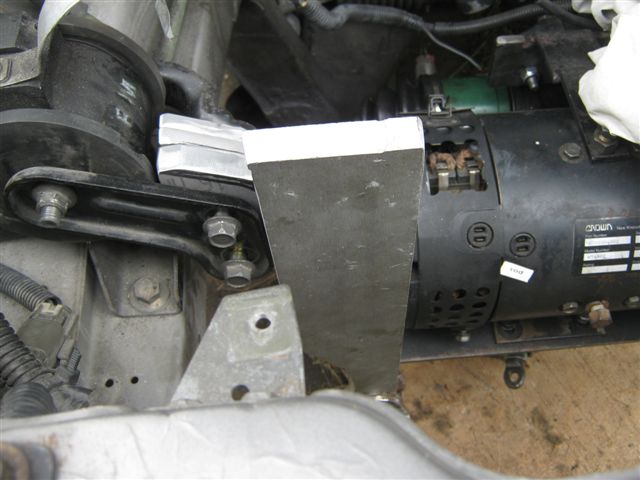 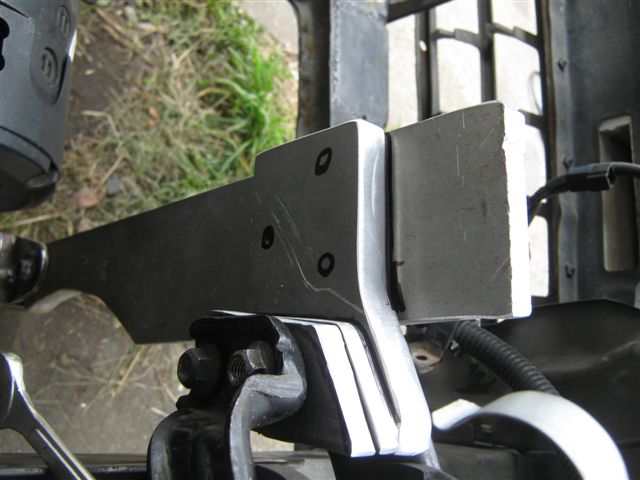 The mounting and the link are drilled and thread is also cut in the link's body so the mounting and the link can be bolted to each other. The link and the mounting are connected, and at this point we can remove the jack that supports the electric motor and see how the mounting is performing. 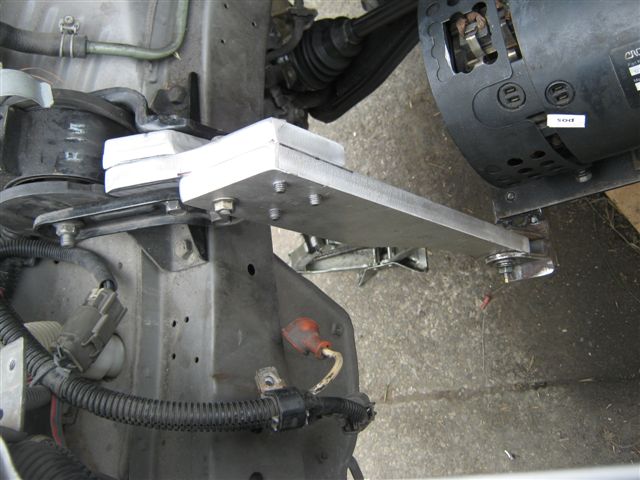  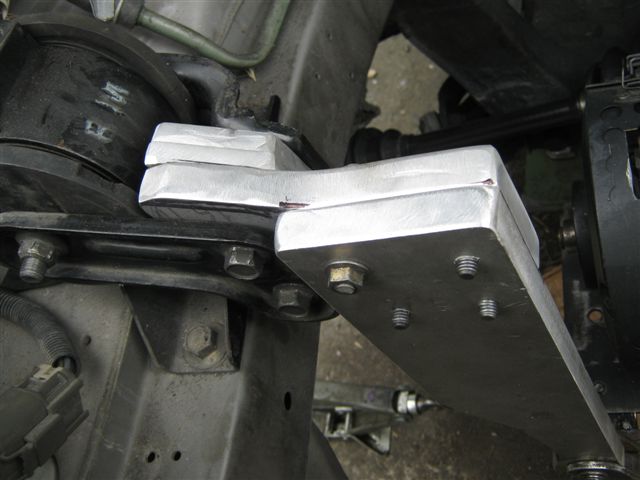 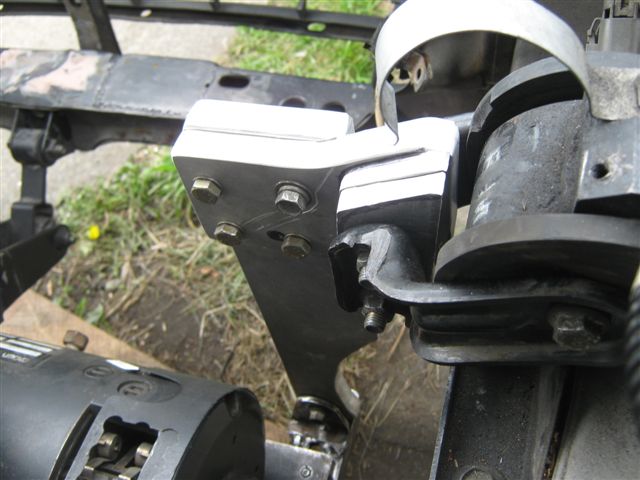 When people building an electric cars in most cases they sacrificing many different features that available in many cars that equipped with ICE, thus for many conversions availability of power steering is no question - in 99% of conversions people trying to avoid complications of power steering installation, and as a result they are ending up with cars that require a super strong driver especially if the car was designed to be used along with power assisted steering wheel. Thus at the very beginning of our Nissan EXA conversion we decided to remain all features of the car including the power steering system and vacuum boosted brakes. On the pictures below you can see the original power steering pump that is placed at its original location while installed on ICE, the pump will be installed along with small electric motor. 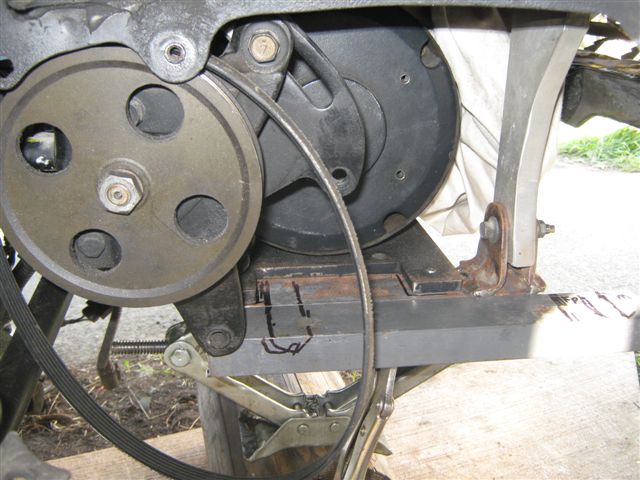 on this picture you see that the pump is going to be installed on the same metal support that supports the rear end of the power unit, and to install the pumps mountings we will need another piece of the metal trough: on this picture you see that the pump is going to be installed on the same metal support that supports the rear end of the power unit, and to install the pumps mountings we will need another piece of the metal trough: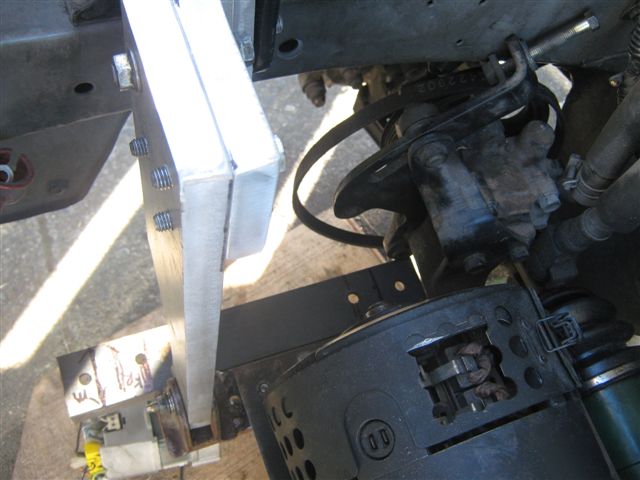 On the picture below is power unit rear support is marked for the steering pump mountings installation. 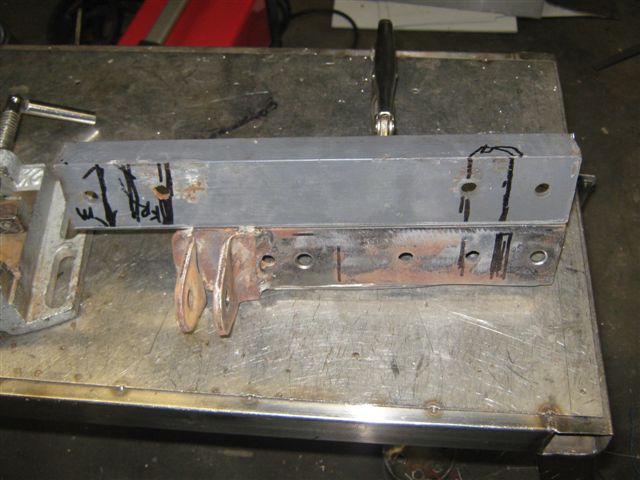 On the following pictures you can see the sequence of the mountings fabrication pump installation. First of all the metal troughs are welded to each other along the top and the bottom sides to form uniform and rigid construction. Then we welded two pendants that were cut out of 4mm thick flat metal, also you can see that the spacer was fabricated out of thick metal tube, the spacer is placed between the pendants and will prevent pump mountings and pendants from distortion and breakage.   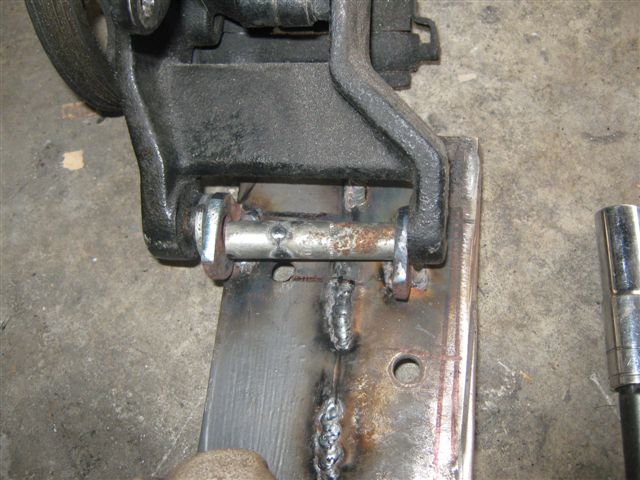   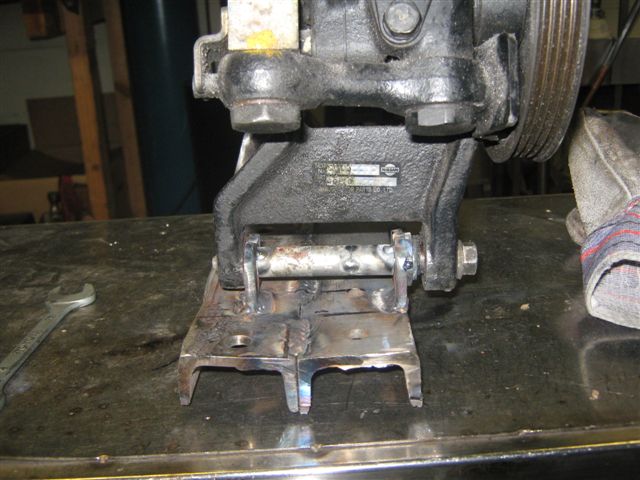 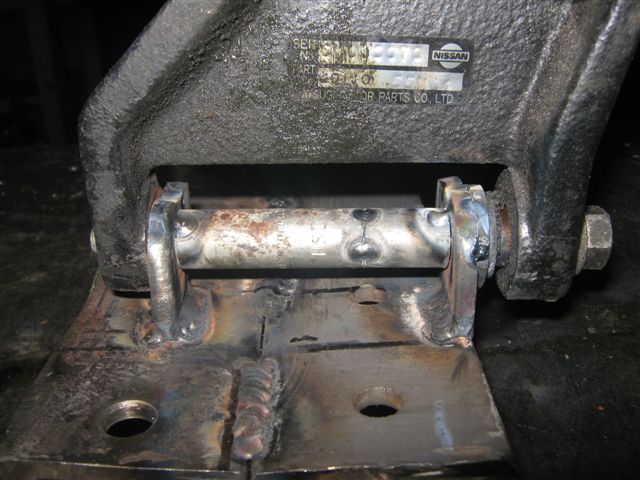 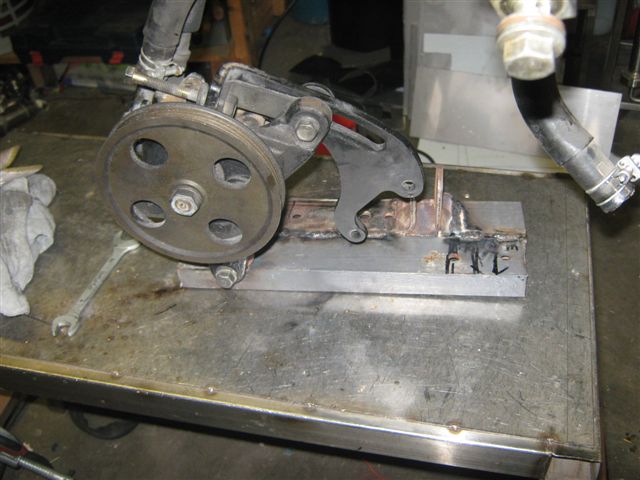 Continue to page 3 |